
Sunjars are great little solar powered jars of light. They're great for spending long summer nights outside. Unfortunately they also cost about $40 a pop. Unless you make your own!
Here's what you'll need
- Mason jars - ~$3 - $6 depending on the size. We got ours at Ikea
- 1 can of Glass Frosting Spray - $8. You can pick this up in the spray paint section of a home improvement store
- Solar Powered Path Lights - $5. These can also be picked up from a big box home improvement store.
- Stick on Blind Spot Mirrors - $1. OPTIONAL. Can be purchased at an auto supply store.

Supplies can be picked up for around $10/light depending on the size of the jar
Wash and dry the mason jar so they are grease free and the spray paint will stick. Follow the instructions on the can of spray paint to spray the body of the jar only. Cover the top of the jar with newspaper or something to block the spray paint. This needs to be clear so the sun can power the light. Set them aside to dry for an hour or two.
Next you will need to disassemble the path light. You'll probably need some tin snips and a screwdriver for this step. Pop off the top of the lamp and throw this part away:

Here's where my lack of pictures hurt so I'll probably pilfer from some the interwebs. Pop the solar panel out of the top of the housing. It will probably be glued down somehow so take care not to crack the panel.

The solar assembly is attached to a battery pack inside the tin housing. Cut through the tin housing taking care not to snip any of the wires or hurt the solar panel. You should be left with this:

When you get to this point you'll probably want to start putting them in the sun to gather light so you can test them when you're done.
Glue the battery pack to the solar panel. We started with hot glue, when that didn't hold we switched to gorilla glue.

Hopefully your mason jars are dry by now. If you're using the mirrors to increase the light, now would be a good time to stick them to the bottom of the jars.

This next part took some trial and error on our part. The solar panels were just the tiniest bit too big to fit in the very top of the mason jar. They were however the perfect size to fit on the rim, this made it a little slippery when it came time to glue it in. Our solution ended up being to run the tiniest bead of gorilla glue around the outer edge of the solar panel. Gorilla glue expands when it dries so you really want to use it sparingly. Place the solar panel in the top of the mason jar and use a hot glue gun to temporarily secure the solar panel into place while the gorilla glue dries.

After using the gorilla glue around the outer perimeter of the solar panel place the panel in the top of the mason jar so the panel is facing the top.

Part of our trial and error. At this point you should already have gorilla glued it and be using a hot glue gun to secure it while the gorilla glue dries.
I used a rubber band around that as well for extra security.

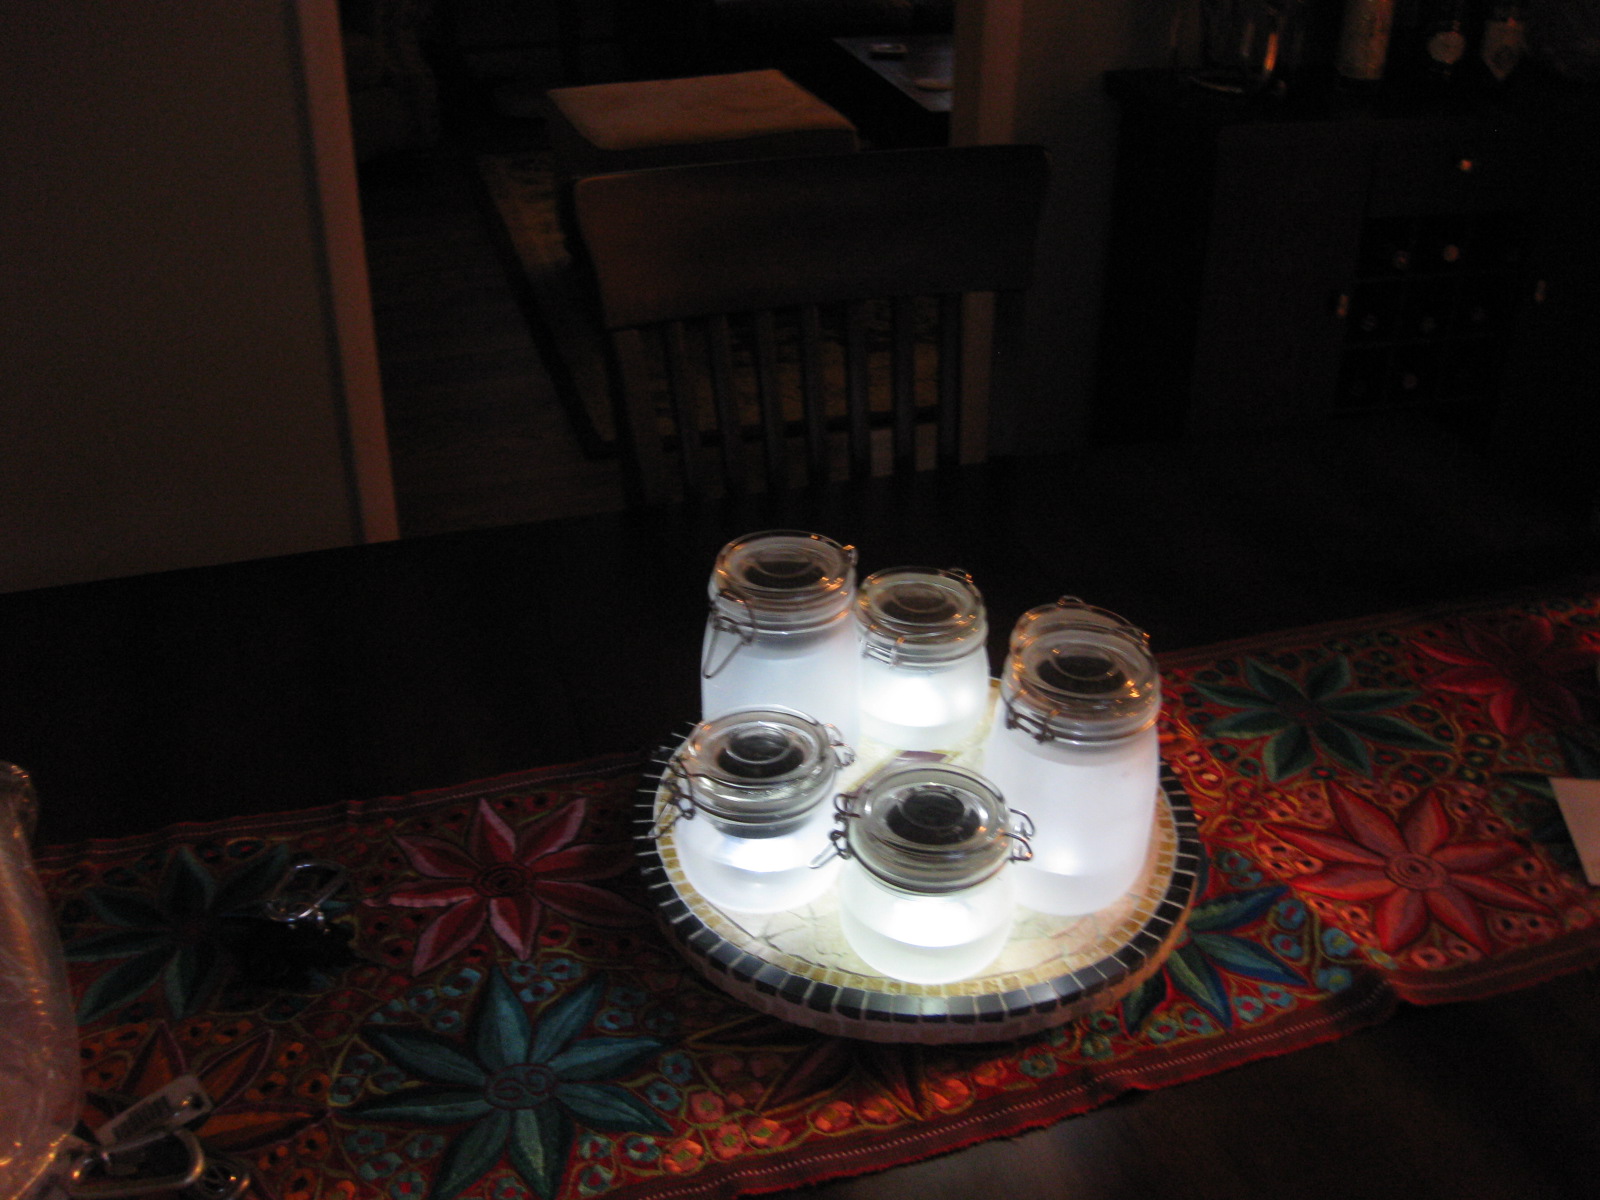
Set them in the sun to catch some rays, and viola!!! Your own sunjars for a fraction of the price.

Rumor has it you can use cellophane (like the wrapping on a Gatorade bottle) to color the lights in your sunjar. Eric and I haven't found any that are a good color and will still let light through since Gatorade changed their packaging. If you'd like to try this cut a one inch square section of the wrapper and tape it over the bulb. Make sure to tape all the edges securely.
2 comments:
This is really kind of cool. I think I'm going to try and harvest some of this Florida sunshine with one of these.
Thanks for the tip!
~Butch
Good luck, Butch!
Post a Comment